BMDE host components installation in Linux
1. Objectives
The objective of this doc is to explain how to install and verify installation in the host of the BMDE toolchain components. The BMDE is used in subjects:
- Computers (primary focus): The whole Computers subject uses all software described in this documentation.
- Operating Systems Structure (ESO) (secondary focus): Only the practical part of this subject needs all software described in this documentation.
- Fundamentals of Computers (FC) (tertiary focus): Only debug, build and edit.
2. Deployment Strategy and Docker Considerations
Since Milax is the de-facto Linux environment used by students, and the system image is managed centrally, the recommended approach is to use bare-metal installations, instead of using the Docker based installations already built for the BMDE CLI.
When tools are already deployed directly on an operating system under full administrative control (as milax is), Docker does not provide significant added value. Therefore, a native package-based installation is preferred.
Docker may still be offered as an optional alternative, knowing Docker itself is installed on the milax image. It is not necessary to integrate specific Docker images directly into the Milax distribution.
3. BMDE operations vs software components
A component can be understood as an independent piece of software. One or more components are used together for each operation of the BMDE.
This guide will explain how to: * Install each component, either the explanation of each step and the proposed commands to do it. * Test the installation of each needed component. * Test that each operation is working as expected.
The needed files for everything will be in the provided file host_install.bz2
All proposed commands assume that CWD=/path/to/host_install
4. Installation considerations
# Install dependencies if not present (apt-get is idempotent but good to check)
sudo apt-get update && sudo apt-get install -y --no-install-recommends \
    wget \
    bzip2
Each code snippet assume that previous snippets have been run successfully.
Snippets can be executed:
* Manually, copying code line by line to a terminal
* Using the corresponding file for that snippet. The corresponding file for each snippet can be found in the source code
of each snippet in this guide. This is because each snippet is embedded in the docs with mkdocs or with the script
scripts/render-guide.py. Each script can be run with bash components/COMPONENT/scripts/SCRIPT.sh.
* Using an IDE that supports running markdown snippets or installing extensions for that purpose. In PyCharm
you can click in the green button of each snippet to run it in the embedded terminal. We recommend unchecking
Close session when it ends, in Settings->Tools->Terminal to see the results after running the script. Also, notice
that there are some calls to sudo in the snippets, which usually stops the execution due to the command asking for
the password. What we can do to solve this is: Execute the snippet, wait for the password prompt to appear and input
your password. After the command with authentication has run (and the snippet execution has stopped in the middle),
run the snippet again. Since sudo caches the recent authentications, this time the sudo command will not interrupt
the snippet execution.
Operations
Build Operation
Components:
* make
* devkitARM r46:
* arm-none-eabi-gcc
* arm-none-eabi-as
* arm-none-eabi-ld
* ndstool (not needed for FC subject):
* libNDS (not needed for FC subject):
* devkitPro NDS project examples (optional)
Component installation
make
Explanation
Install make using your package manager.
The installed binary is expected to be automatically included in your
$PATH by the package manager and because of that available directly through shell commands.
Proposed command
#!/bin/bash
set -eo pipefail

sudo apt-get update && sudo apt-get install -y --no-install-recommends make
Test component
devkitARM
Explanation
Create 3 new permanent environment variables, which are used in the Makefiles:
* DEVKITPRO with value /path/to/installation/of/devkitPro/.
* DEVKITARM with value /path/to/installation/of/devkitARM/.
* DESMUME with any value (it just needs to be defined so that it passes the checks of the Makefiles).
Modify permanently the PATH variable, prepending (writing at the beginning) the path $DEVKITARM/bin to the
variable. Including the directories in the $PATH make the files in the included directories directly available through
shell commands. The prepending is
done to give more priority to our binaries than the system binaries. This priority can be implemented differently
if
no priority is needed or this priority is implemented in any other way.
Create the directories $DEVKITARM and $DEVKITPRO.
Download devkitARM from here.
Decompress it in the folder $DEVKITARM.
Copy examples into $DEVKITPRO.
Optionally, clean installation outputs.
Proposed command
#!/bin/bash
set -eo pipefail
export DEVKITPRO="$HOME/bmde/devkitPro"
export DEVKITARM=$DEVKITPRO/devkitARM
DEST="$HOME/.bashrc"
# Install environment variables if not already set
if ! grep -q "export DEVKITPRO=" "$DEST"; then
echo "export DEVKITPRO=$DEVKITPRO" >> "$DEST"
fi
if ! grep -q "export DEVKITARM=" "$DEST"; then
echo "export DEVKITARM=$DEVKITARM" >> "$DEST"
fi
if ! grep -q "export DESMUME=" "$DEST"; then
echo "export DESMUME=/" >> "$DEST"
fi
if ! grep -q "export PATH=.*\$DEVKITARM/bin" "$DEST"; then
echo "export PATH=\"\$DEVKITARM/bin:\$PATH\"" >> "$DEST"
fi
mkdir -p "$DEVKITPRO" "$DEVKITARM"
# Download and install devkitARM only if not already installed
rm -f /tmp/devkitARM.tar.bz2
wget --no-check-certificate "https://wii.leseratte10.de/devkitPro/devkitARM/r46%20%282017%29/devkitARM_r46-x86_64-linux.tar.bz2" -O /tmp/devkitARM.tar.bz2 \
rm -rf "$DEVKITARM"
tar -xf /tmp/devkitARM.tar.bz2 -C "$DEVKITPRO" \
rm /tmp/devkitARM.tar.bz2
# Copy examples if they exist in current directory and destination doesn't have them
rm -f /tmp/examples.tar.bz2
wget https://raw.githubusercontent.com/URV-teacher/devkitarm-nds-docker/master/data/examples.tar.bz2 -O /tmp/examples.tar.bz2
rm -rf "$DEVKITPRO/examples"
tar -xjf /tmp/examples.tar.bz2 -C "$DEVKITPRO"
rm /tmp/examples.tar.bz2
Test component
#!/bin/bash
set -eo pipefail

make --help && \
arm-none-eabi-gcc --help && \
arm-none-eabi-as --help && \
arm-none-eabi-ld --help && \
ndstool -?
libnds
Explanation
Download and decompress the file libnds.tar.bz2 into $DEVKITPRO. The file libnds.tar.bz2 has been obtained
directly
from the original BMDE folder implementation, so in case of update of the original BMDE, it will be needed to update
the provided file.
This component is only used in the compilation of projects, so its testing involves the building of a NDS project
(operation test). That is why the test will be skipped for this component and the
corresponding folder hello-world-nds is provided.
Proposed command
#!/bin/bash
set -eo pipefail
rm -f /tmp/libnds.tar.bz2
wget https://raw.githubusercontent.com/URV-teacher/devkitarm-nds-docker/master/data/libnds.tar.bz2 -O /tmp/libnds.tar.bz2
rm -rf "$DEVKITPRO/libnds"
tar -xjf /tmp/libnds.tar.bz2 -C "$DEVKITPRO"
rm /tmp/libnds.tar.bz2
Test operation
#!/bin/bash
set -eo pipefail

rm -rf /tmp/hello-world-nds
git clone https://github.com/URV-teacher/hello-world-nds.git /tmp/hello-world-nds

(
  cd hello-world-nds
  make
  [ -f hello-world-nds.nds ]
)
rm -rf hello-world-nds
# desmume hello-world-nds.nds  # It can be further validated if we have DeSmuME installed.
It may be possible that you need to modify a minor thing in the internal file ds_rules, that provides building rules
for NDS projects.
Optionally, we can also test the operation with the NDS devkitPro project examples:
#!/bin/bash
set -eo pipefail

cd "$DEVKITPRO/examples"
for i in *; do
  if [ -d "$i" ]; then
      comp_msg=$(cd "$i" && make clean && make 2>&1)
      echo "$comp_msg"
  fi
done
Run Operation
Components:
* DeSmuME 0.9.11
* $DESMUME/DeSmuME.exe wrapper (optional, to be compatible with Makefiles)
* make, for make run target (make already explained in build section)
Component installation
desmume
Explanation
Install desmume using your package manager. The installed binary is expected to be automatically included in your
$PATH by the package manager and because of that available directly through shell commands.
Create (or modify) 1 permanent environment variables. This is used in the run target of the Makefiles:
* DESMUME with value /path/to/installation/of/desmume/.
Proposed command
#!/bin/bash
set -eo pipefail

DEST="$HOME/.bashrc"
DESMUME="$DEVKITPRO/DeSmuME_0.9.11"
COMMAND="export DESMUME=$DESMUME"

mkdir -p "$DESMUME"

if ! grep -q "$COMMAND" "$DEST"; then
    echo "$COMMAND" >> "$DEST"
fi

sudo apt-get update && sudo apt-get install -y --no-install-recommends desmume
Test component
To test the component we will use the NDS example with sound:
#!/bin/bash
set -eo pipefail

cd "$DEVKITPRO/examples/nds/audio/maxmod/basic_sound"
# candyNDS_full is already built, but if not you can build it with make, testing also the build operation
desmume basic_sound.nds
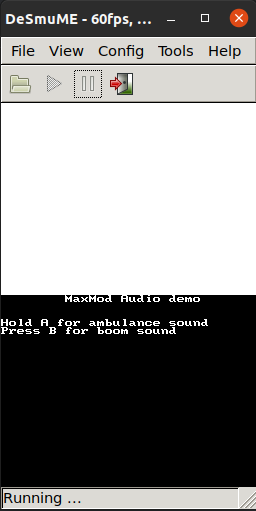
In addition to being able to run it, you should hear sound to validate the sound feature of DeSmuME.
$DESMUME/DeSmuME.exe wrapper
Explanation
Optionally, to make the installation of DeSmuME compatible with the run target of Makefiles, we need to make
available the
file $DESMUME/DeSmuME.exe, because it is explicitly referenced by the Makefiles.
To do so, we can create a wrapper that forwards the call from $DESMUME/DeSmuME.exe into desmume command. We could
implement this in another way, such a shell alias.
Proposed command
#!/bin/bash
set -eo pipefail

cat <<'EOF' > "$DESMUME/DeSmuME_dev.exe"
#!/usr/bin/env bash
exec desmume "$@"
EOF

chmod +x "$DESMUME/DeSmuME_dev.exe"
Test component
You should see appear the window of DeSmuME.
Test operation
#!/bin/bash
set -eo pipefail

rm -rf /tmp/hello-world-nds
git clone https://github.com/URV-teacher/hello-world-nds.git /tmp/hello-world-nds

(
  cd hello-world-nds
  make
  make run
)
rm -rf hello-world-nds
You should see the DeSmuME window appearing with the hello-world message.
This test is accumulative with the build operation, because it implies it, so, if a functional .nds binary can be
generated from source code and executed using desmume, the environment can be considered operational.
Debug Operation
Components:
* DeSmuME 0.9.11 with argument --gdbport=$PORT to listen to TCP port $PORT
* GDB debugger. Can be one of the following (WIP):
- devkitARM r46:
* arm-none-eabi-gdb, available in $DEVKITARM/bin/arm-none-eabi-gdb (already explained in build operation section)
- gdb-multiarch, available through package manager
- insight, installed from source code
* make, for make debug target (make already explained in build operation section)
Component installation
DeSmuME 0.9.11 with argument --gdbport=$PORT to listen to TCP port $PORT
Explanation
Using the desmume command obtained in the previous section Run Operation with argument --gdbport=$PORT. We recommend
PORT to be higher or equal to 1024 to avoid problems, since lower ports are privileged and give problems.
Unluckily the Makefiles has the hardcoded argument --gdbport=1000 in the make debug option, so it may be not
possible to use this target.
Test component
To test the component we will use the NDS example with sound:
#!/bin/bash
set -eo pipefail

cd "$DEVKITPRO/examples/nds/audio/maxmod/basic_sound"
desmume --arm9gdb=1024 basic_sound.nds &>/dev/null &  # --arm9gdb-port instead of --arm9gdb= In newer versions
DESMUME_PID=$!
sleep 2
if netstat -tlp 2>/dev/null | grep -q 1024; then
  echo "DeSmuME listening to port"
else
  echo "DeSmuME not listening to port"
fi
kill -9 $DESMUME_PID
You should see DeSmuME listening to port in your terminal if everything was OK.
arm-none-eabi-gdb
Explanation
GDB binary bundled with devkitARM. Proposed installation commands are the same as Build Operation.
You will need to install the library ncurses5 as a runtime dependency.
You can do that with:
Test component
gdb-multiarch
Explanation
Standard multi-architecture GDB provided via package manager.
Proposed command
Test component
insight (from source)
Explanation
Insight is the original debugger (and simulator for FC) in the BMDE debugger.
Proposed command
To build insight:
set -eo pipefail

export DEBIAN_FRONTEND=noninteractive

SRC_DIR="/tmp/insight-src"
INSIGHT_REPO="git://sourceware.org/git/insight.git"

sudo apt-get update
sudo apt-get install -y \
    autoconf \
    automake \
    autogen \
    tk-dev \
    tcl-dev \
    libgmp-dev \
    libmpfr-dev \
    texinfo \
    bison \
    flex \
    git \
    build-essential


rm -rf "${SRC_DIR}"
mkdir -p "${SRC_DIR}"
git clone --depth 1 --recursive "${INSIGHT_REPO}" "${SRC_DIR}"

(
  cd $SRC_DIR

  autoconf
  autoupdate

  ./configure \
      --prefix=/usr/local \
      --libdir=/usr/lib64 \
      --disable-binutils \
      --disable-elfcpp \
      --disable-gold \
      --disable-gprof \
      --disable-ld \
      --disable-rpath \
      --disable-zlib \
      --enable-sim \
      --with-gdb-datadir=/usr/share/insight \
      --with-jit-reader-dir=/usr/lib64/insight \
      --with-separate-debug-dir='/usr/lib/debug' \
      --with-expat \
      --without-libunwind \
      --without-isl \
      --without-python

  make -j"$(nproc)"
  sudo make install
)
Runtime dependencies:
sudo apt-get update && sudo apt-get install -y \
    itcl3 \
    itk3 \
    iwidgets4 \
    libgmp10 \
    libmpfr6 \
    libexpat1
Test component
@$(DEVKITPRO)/insight/bin/arm-eabi-insight.exe wrapper
Explanation
Optionally, to make the installation of DeSmuME compatible with the run target of Makefiles, we need to make
available the
file $(DEVKITPRO)/insight/bin/arm-eabi-insight.exe, because it is explicitly referenced by the Makefiles.
To do so, we can create a wrapper that forwards the call from $(DEVKITPRO)/insight/bin/arm-eabi-insight.exe into
insight command. We could
implement this in another way, such a shell alias.
Proposed command
#!/bin/bash
set -eo pipefail

mkdir -p "$DEVKITPRO/insight/bin"

cat <<'EOF' > "$DEVKITPRO/insight/bin/arm-eabi-insight.exe"
#!/usr/bin/env bash
exec insight "$@"
EOF

chmod +x "$DEVKITPRO/insight/bin/arm-eabi-insight.exe"
Test component
You should see appear the window of Insight.
Test operation through make debug
Test the debug operation using Makefile and the example program Mastermind. The binary is already built in Mastermind
folder, but if you build it
make sure
that the flags -gdwarf-3 and -O0 are in the CFLAGS (arguments passed to gcc) of the Makefile. This applies to
all programs that you want to debug:
wget https://raw.githubusercontent.com/URV-teacher/insight-docker/master/data/Mastermind.tar.bz2 -O /tmp/Mastermind.tar.bz2
tar -xjf /tmp/Mastermind.tar.bz2
rm /tmp/Mastermind.tar.bz2

cd Mastermind
make clean
make

make debug  # Implicitly uses
After running the commands you should see both the Insight window and the DeSmuME window similarly to this:
To start the debug session you need to do the following
1. Click in the terminal icon of Insight  2. In the Insight GDB console, execute:
break MM_check to set a breakpoint into the ARM function MM_check.
6. Then, you should introduce the command continue in the GDB console. After that, the debugger window should be blocked
and DeSmuME already running and waiting for input.
7. Use the keyboard to press the buttons of the emulated NDS and introduce the required input for the Mastermind
program. In this case, you need to press they key Z three times.
8. After that, it will be the opposite: DeSmuME window is blocked and the debugger is answering again.
9. Introduce the command continue. After that, the debugger window should be blocked
and DeSmuME already running and waiting for input.
10. Introduce the required input with the buttons into MasterMind program.
11. DeSmuME window is blocked and the debugger is answering again.
12. Now press again source code to see the ARM source code.
13. Now press other buttons of the GUI to evaluate its functionality.
Test operation manually
You can also test the debug operation "manually" calling directly the commands to do a debug session. Instead of Insight, you may use any other GDB command, but we will explain the test using inside because it is the most featured debugger:
wget https://raw.githubusercontent.com/URV-teacher/insight-docker/master/data/Mastermind.tar.bz2 -O /tmp/Mastermind.tar.bz2
tar -xjf /tmp/Mastermind.tar.bz2
rm /tmp/Mastermind.tar.bz2

cd Mastermind
make clean
make

# Being in the same working directory as the project root that we are debugging is important to let insight see the
# source code.
desmume --gdbport=1024 Mastermind.nds &
insight Mastermind.elf  # Also gdb-multiarch or arm-none-eabi-gdb should work
What you should see afterward is the same as in the previous section.
Edit Operation
Components: * Visual Studio Code * arm-nds-vscode-extension
The goal is to provide an IDE to edit code and have syntax highlight for: * ARM v5 assembly (Nintendo DS) * C language
Visual Studio Code
Explanation
Visual Studio Code is a modern IDE.
We will install it using the prebuilt binaries available in their website.
Proposed command
VSCODE_DIR=/bmde/vscode
echo PATH=$VSCODE_DIR/bin:$PATH >> $HOME/.bashrc

mkdir -p $VSCODE_DIR

apt-get update && apt-get install -y --no-install-recommends \
    wget \
    ca-certificates \
 && wget --no-check-certificate -L "https://code.visualstudio.com/sha/download?build=stable&os=linux-x64" -O /tmp/vscode.tar.gz \
 && tar -xzvf /tmp/vscode.tar.gz -C $VSCODE_DIR \
 && rm /tmp/vscode.tar.gz

apt-get purge -y \
    wget \
    ca-certificates \
    && apt-get autoremove -y \
    && rm -rf /var/lib/apt/lists/*
Test component
Should start the program.
NDS ARM Assembly Syntax Highlight extension
Explanation
Extension for VSCode to enable syntax highlight for ARM v5. Available in the marketplace.
Proposed command
Once we have the command vscode available we can do the following to install the extension:
LATEST_VERSION=$(curl -s https://api.github.com/repos/URV-teacher/arm-syntax-vscode-extension/releases/latest | grep "tag_name" | cut -d '"' -f 4)
LATEST_VERSION=${VERSION:1}
wget -O arm-syntax-vscode-extension.vsix \
  https://github.com/URV-teacher/arm-syntax-vscode-extension/releases/download/v${LATEST_VERSION}/arm-syntax-vscode-extension-${LATEST_VERSION}.vsix  # Download latest release
code --install-extension arm-syntax-vscode-extension.vsix  # Install extension
Test operation
Then, open file Mastermind/source/mm_check.s in the IDE.
You should see the syntax highlight for ARM in this file of the Mastermind project.
VCS Operation
Components: * git * ssh-client * forticlient or openfortivpn
Component installation
git
Explanation
Install git and gitk using your package manager. Version control for course software projects.
Proposed command
Test component
ssh-client
Explanation
SSH authentication is required for accessing the repositories.
Proposed command
Test component
forticlient or openfortivpn
Explanation
VPN access to the university network. Course Git repositories are only accessible from within the university network. VPN access is therefore required for off-campus work.
Proposed command
For openfortivpn:
Test component
Test operation
When connected to the VPN (or on campus), the following command should work:
This requires:
* The Git server to be active
* The repository comp_25 to exist
* Proper access permissions
The Git server is maintained by the course supervisor: Santiago Romaní (santiago.romani@urv.cat)
Optional Operations
Components: * grit
Component installation
grit
Explanation
Grit is a tool for converting images into GBA/NDS compatible formats. It is useful for graphics development on the NDS.
Proposed command
Download the latest release from the GitHub repository or install via package manager if available.
Assuming a manual installation from a tarball:
GRIT_DIR=/bmde/grit
mkdir -p $GRIT_DIR
wget -O /tmp/grit.tar.bz2 "URL_TO_GRIT_TARBALL"
tar -xf /tmp/grit.tar.bz2 -C $GRIT_DIR
rm /tmp/grit.tar.bz2
echo PATH=$GRIT_DIR:$PATH >> $HOME/.bashrc
Test component
Test operation
To test grit, you can try converting a simple image:
myimage.s and myimage.h files.